
Introduction
The OpenAPI specification is a language-agnostic definition format used to describe RESTful APIs. Nest provides a dedicated module which allows generating such a specification by leveraging decorators.
Installation#
To begin using it, we first install the required dependency.
$ npm install --save @nestjs/swagger
Bootstrap#
Once the installation process is complete, open the main.ts file and initialize Swagger using the SwaggerModule class:
import { NestFactory } from '@nestjs/core';
import { SwaggerModule, DocumentBuilder } from '@nestjs/swagger';
import { AppModule } from './app.module';

async function bootstrap() {
  const app = await NestFactory.create(AppModule);

  const config = new DocumentBuilder()
    .setTitle('Cats example')
    .setDescription('The cats API description')
    .setVersion('1.0')
    .addTag('cats')
    .build();
  const document = SwaggerModule.createDocument(app, config);
  SwaggerModule.setup('api', app, document);

  await app.listen(3000);
}
bootstrap();
Hintdocument(returned by theSwaggerModule#createDocument()method) is a serializable object conforming to OpenAPI Document. Instead of hosting it via HTTP, you could also save it as a JSON/YAML file, and consume it in different ways.
The DocumentBuilder helps to structure a base document that conforms to the OpenAPI Specification. It provides several methods that allow setting such properties as title, description, version, etc. In order to create a full document (with all HTTP routes defined) we use the createDocument() method of the SwaggerModule class. This method takes two arguments, an application instance and a Swagger options object. Alternatively, we can provide a third argument, which should be of type SwaggerDocumentOptions. More on this in the Document options section.
Once we create a document, we can call the setup() method. It accepts:
- The path to mount the Swagger UI
- An application instance
- The document object instantiated above
- Optional configuration parameter (read more here)
Now you can run the following command to start the HTTP server:
$ npm run start
While the application is running, open your browser and navigate to http://localhost:3000/api. You should see the Swagger UI.
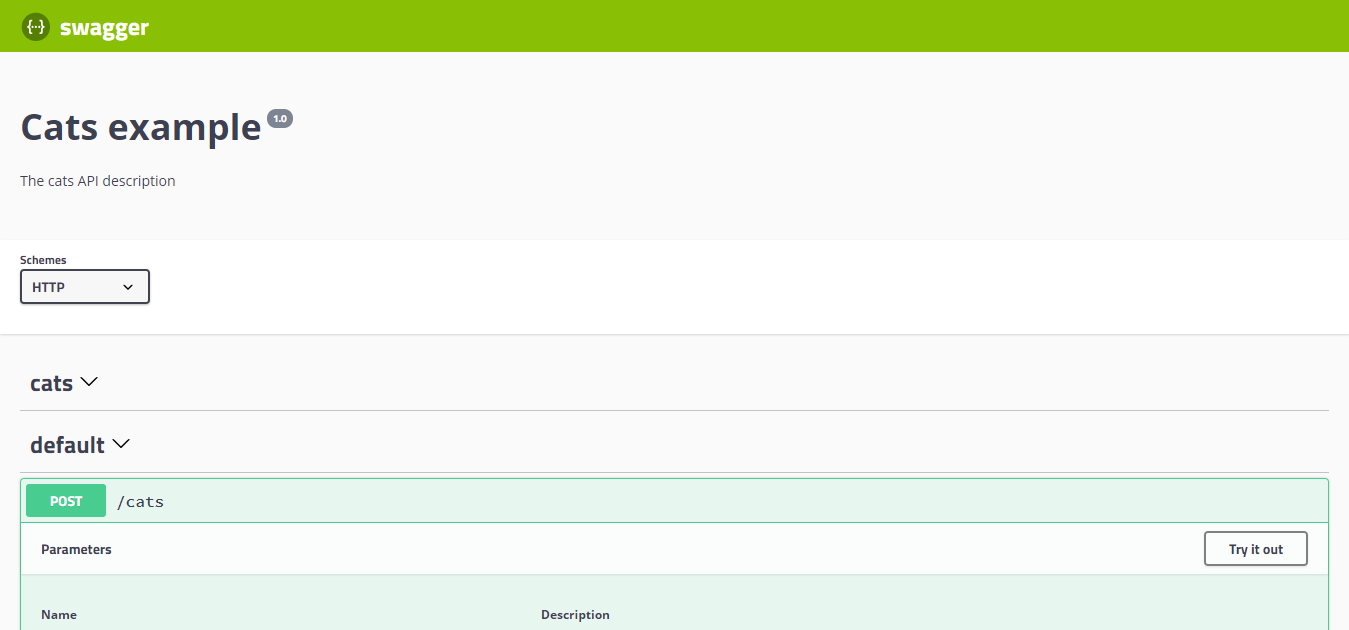
As you can see, the SwaggerModule automatically reflects all of your endpoints.
Hint To generate and download a Swagger JSON file, navigate tohttp://localhost:3000/api-json(assuming that your Swagger documentation is available underhttp://localhost:3000/api).
Warning When usingfastifyandhelmet, there may be a problem with CSP, to solve this collision, configure the CSP as shown below:app.register(helmet, { contentSecurityPolicy: { directives: { defaultSrc: [`'self'`], styleSrc: [`'self'`, `'unsafe-inline'`], imgSrc: [`'self'`, 'data:', 'validator.swagger.io'], scriptSrc: [`'self'`, `https: 'unsafe-inline'`], }, }, }); // If you are not going to use CSP at all, you can use this: app.register(helmet, { contentSecurityPolicy: false, });
Document options#
When creating a document, it is possible to provide some extra options to fine tune the library's behavior. These options should be of type SwaggerDocumentOptions, which can be the following:
export interface SwaggerDocumentOptions {
  /**
   * List of modules to include in the specification
   */
  include?: Function[];

  /**
   * Additional, extra models that should be inspected and included in the specification
   */
  extraModels?: Function[];

  /**
   * If `true`, swagger will ignore the global prefix set through `setGlobalPrefix()` method
   */
  ignoreGlobalPrefix?: boolean;

  /**
   * If `true`, swagger will also load routes from the modules imported by `include` modules
   */
  deepScanRoutes?: boolean;

  /**
   * Custom operationIdFactory that will be used to generate the `operationId`
   * based on the `controllerKey` and `methodKey`
   * @default () => controllerKey_methodKey
   */
  operationIdFactory?: (controllerKey: string, methodKey: string) => string;
}
For example, if you want to make sure that the library generates operation names like createUser instead of UserController_createUser, you can set the following:
const options: SwaggerDocumentOptions =  {
  operationIdFactory: (
    controllerKey: string,
    methodKey: string
  ) => methodKey
};
const document = SwaggerModule.createDocument(app, config, options);
Setup options#
You can configure Swagger UI by passing the options object which fulfills the ExpressSwaggerCustomOptions (if you use express) interface as a fourth argument of the SwaggerModule#setup method.
export interface ExpressSwaggerCustomOptions {
  explorer?: boolean;
  swaggerOptions?: Record<string, any>;
  customCss?: string;
  customCssUrl?: string;
  customJs?: string;
  customfavIcon?: string;
  swaggerUrl?: string;
  customSiteTitle?: string;
  validatorUrl?: string;
  url?: string;
  urls?: Record<'url' | 'name', string>[];
}
Example#
A working example is available here.