Components
Almost everything is a component – Service, Repository, Factory, Helper [...] and they can be injected into controllers or into other components through constructor.
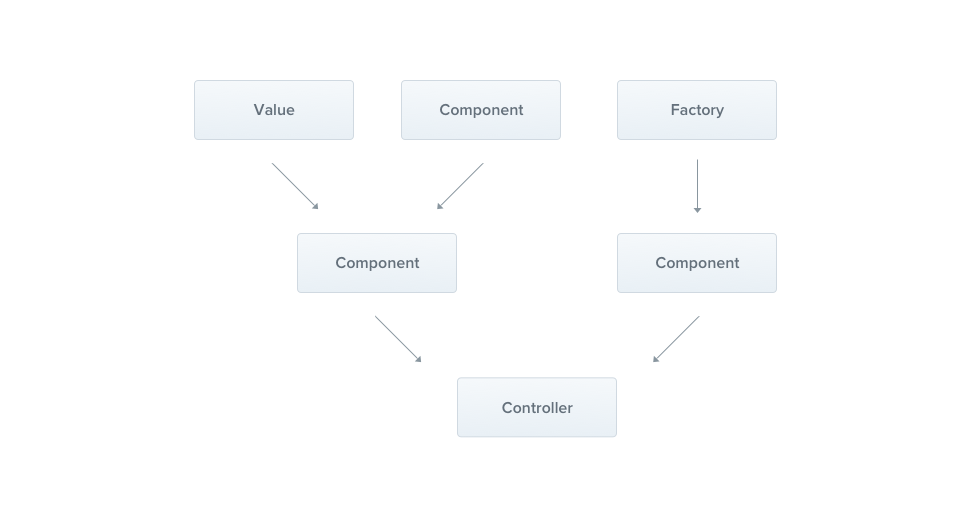
In the previous chapter, we have built a simple CatsController.
The controllers should only handle HTTP requests and delegate more complex tasks to the components.
The components are plain TypeScript classes with a @Component() decorator.
Hint Since Nest enables the possibility to design and organize the dependencies in a more OO-way, we strongly recommend following the SOLID principles.
Let's create a CatsService component:
import { Component } from '@nestjs/common';
import { Cat } from './interfaces/cat.interface';

@Component()
export class CatsService {
  private readonly cats: Cat[] = [];

  create(cat: Cat) {
    this.cats.push(cat);
  }

  findAll(): Cat[] {
    return this.cats;
  }
}
import { Component } from '@nestjs/common';

@Component()
export class CatsService {
  constructor() {
    this.cats = [];
  }

  create(cat) {
    this.cats.push(cat);
  }

  findAll() {
    return this.cats;
  }
}
There's nothing special about components. Here's a CatsService, a basic class with one property and two methods.
The only difference is that it has the @Component() decorator. The @Component() attaches the metadata, thereby Nest knows that this class is a Nest component.
Notice There's aCatinterface here. I didn't mention it because the schema is exactly same as in theCreateCatDtoclass which we have created in the previous chapter.
Since we have the service class already done, let's use it inside the CatsController:
import { Controller, Get, Post, Body } from '@nestjs/common';
import { CreateCatDto } from './dto/create-cat.dto';
import { CatsService } from './cats.service';
import { Cat } from './interfaces/cat.interface';

@Controller('cats')
export class CatsController {
  constructor(private readonly catsService: CatsService) {}

  @Post()
  async create(@Body() createCatDto: CreateCatDto) {
    this.catsService.create(createCatDto);
  }

  @Get()
  async findAll(): Promise<Cat[]> {
    return this.catsService.findAll();
  }
}
import { Controller, Get, Post, Body, Bind, Dependencies } from '@nestjs/common';
import { CatsService } from './cats.service';

@Controller('cats')
@Dependencies(CatsService)
export class CatsController {
  constructor(catsService) {
    this.catsService = catsService;
  }

  @Post()
  @Bind(Body())
  async create(createCatDto) {
    this.catsService.create(createCatDto);
  }

  @Get()
  async findAll() {
    return this.catsService.findAll();
  }
}
The CatsService is injected through the class constructor.
Don't be afraid of the private readonly shortened syntax.
It means that we've created and initialized the catsService member in the same location.
Dependency Injection
Nest is built around the strong design pattern commonly known as Dependency Injection. There's a great article about this concept in the official Angular documentation.
Hint Learn more about the Dependency Injection in Nest here.
It's extremely easy to manage dependencies with TypeScript because Nest will resolve your dependencies just by injecting them in your controller's constructor:
constructor(private readonly catsService: CatsService) {}Last step
The last thing is to tell the module that something called CatsService truly exists.
We do this by editing our module file - app.module.ts, and put the service into the components array of the @Module() decorator.
import { Module } from '@nestjs/common';
import { CatsController } from './cats/cats.controller';
import { CatsService } from './cats/cats.service';

@Module({
    controllers: [CatsController],
    components: [CatsService],
})
export class ApplicationModule {}
Now Nest will be able to resolve the dependencies of the CatsController class.
This is how our directory structure looks right now: